
Puzzle Pieces

I remember going to rummage sales specifically looking for old puzzles to buy and put together. I got so obsessed with puzzles, I bought a 6000 piece puzzle, put it together, and glued it for decoration. Overtime I accumulated several puzzles and began not knowing what to do with them. I put my craft mind to work. I want to share with you a few ideas I found to use with my puzzle pieces.


The first project I tried is a simple wreath: What is nice about this project is you can use any puzzle doesn't have to match with a color scheme.
Start with putting the pieces into a circle
For the next layer you can start adding glue to 
the bottom of the colored side of piece and glue


Just go all around the wreath placing each
piece on top of the other pieces. I made three
layers.


      Next I made a Christmas Tree ornament.                Just place the pieces in the shape of the tree and then add pieces on top with glue.
                   

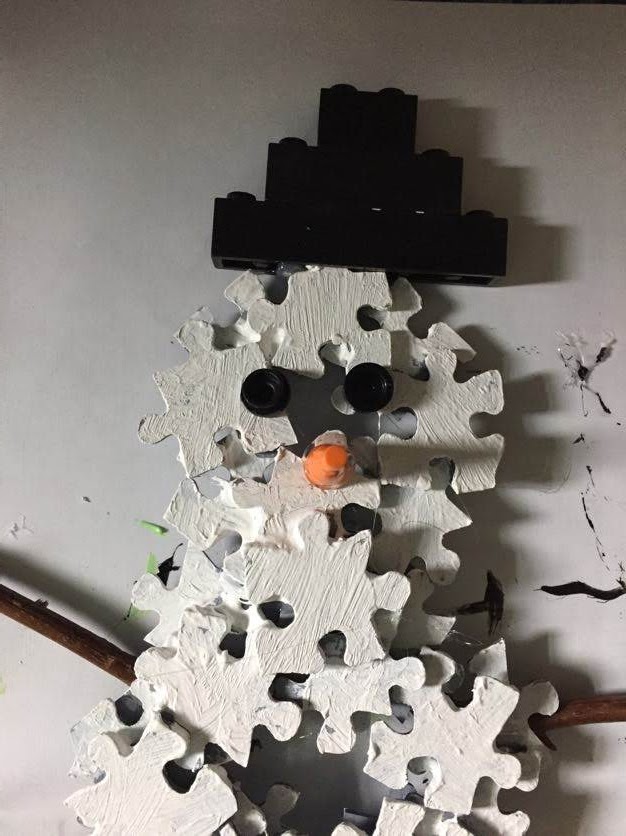
Next I tried a snowman ornament:


first I made three different sized circles and glued them on top of each other.
Next I painted the body white, I used sticks for the arms, and the hat I actually used three legos from our toy box. One is a four peg, three peg, and one is a two peg. Then next picture shows I added eyes and a nose. Again used legos for both.


Also thought I would make a Halloween decoration for the upcoming Holiday. Using the same method as above, I made a BOO sign.


 Here was another project I tried. Just used an old picture frame and scrapbook paper as the background. The letter was again glued together and painted to match the background.

Comments

Popular posts from this blog

Scrabble Letters

Sitting down and playing a good old game of scrabble was not always at the top of my list of things to do. I recently found my old game on the shelf and was ready to use it in a different way. This is a very simple project that will not take long. Here is what you will need: scrabble letters, scrapbook paper, button, canvas and hot glue gun. My canvas is 12 by 12 inches. This is a good size because most scrapbook paper is bigger in size so all you will have to do is just trim to fit the canvas. Then its just like playing scrabble use the letters to make whatever design you would like. In my first picture I used a last name, Milfury and then the family members. In the pictures below you will see I used the word Family and then words around it to explain what family means to me. I have also given this to a grandmother as a gift with all of her grand kids surrounding the grandmother word. You will have to really think about the layout before you start gluing. Once you find the right

Decorative Letters

ABCDEFG, what can you do with just a letter? Most of my ideas come from the internet, catalogs, or from others. When I started this project I wanted something I could have up at all times of the year. My goal was to eventually have different letters decorated for different themes. Think of what theme you are looking for; a particular season, a holiday, or just a traditional look that can stay up all year. The picture below shows how I decorated my mantle above the fire place. I already had a old window I pulled out of my shed. In the top three open spots I usually put undated pictures of my three girls. Just an FYI when you buy your first letter you will realize there are several different types of letters: wood ones, card board, light up, ones that stand, ones that are flat, and on and on. I strongly encourage you to think of your project ahead of time. I have three young kids and at this time in my life FAMILY is a good theme. First thought was how will I decorate each letter so

More Paper crafts

Found a few more ideas to add to my paper craft collection. I was browsing the internet for crafts with paper or for things that I have not tried. I came across a Christmas idea just in time for my favorite holiday. I have to admit it's a lot harder than it looks. This is my first one that I made and I can already see some of the changes I will make for the next one.  Now let's get started, here is a step by step guide.  First you will need Cardboard, glue gun, scrapbook paper, ribbon:   You can use a roll from wrapping paper or from a roll of plastic. I used one from house wrap. I quickly realized you will need a strong base for this project. I started just holding it up as I was working but quickly found out I should have made a base. I ended up taking an old vase that was small enough around to fit the inside of the roll and used that as my base. When I make another one I will make a base around the bottom to make it more sturdy. Then I took scrapbook paper that was gree